


Twig (F2)
This pattern is a bit of a cheat. It's not really a pattern at all, just a set of instructions. A twig is formed by covering a wire frame in i-cord tubes. The less branches your twig has, the easier it is to make.
A printable version of this pattern is available.
You will need:
- brown yarn (double knit)
- covered thin gauge wire (e.g. garden twist tie)
- gummed tape
- 2 x double ended knitting needles (3mm)
- tapestry needle
- scissors
Instructions:
(A list of standard abbreviations is available.)
Zero Branch Twig:
The zero branch twig (aka “a stick”) is the simplest sort of twig.
First make the wire frame by bending a thin piece of covered wire in half (1) and turning the ends up (2). Turning the ends up thickens the base of the twig and helps stop the sharp ends of the wire poking out the knitting.
If you are still worried about rough ends, cover the join in a little gummed tape.
Cast on 5 stitches in brown and i-cord around half the length of the wire frame.
Knit two stitches together at the beginning of the next row. Continue to i-cord until the knitting is the same length as the wire frame.
Slip the wire frame inside the i-cord (wiggle it to stop the yarn snagging).
Thread yarn through remaining stitches and pull tight. Sew in the loose ends.
One Branch Twig:
First make the wire frame by bending the wire into a y-shape (3). Double over the ends and cover with gummed tape.
Cast on 5 stitches and i-cord until the knitting is the same length as the upright of the y-shape. Thread yarn through remaining stitches.
Cast on 4 stitches and i-cord until the knitting is the same length as the first of the branches. Thread yarn through remaining stitches. Repeat for the second branch.
Slip the correct bit of wire frame inside each length of i-cord.
Sew all three pieces of i-cord together at the join. Lose any remaining loose ends.
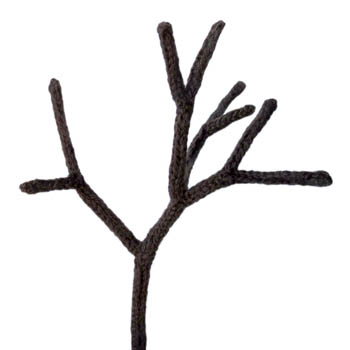
Two Branch Twig:
As soon as you add more than one branch you need to start planning ahead a lot more. Instead of folding the wire frame into the two branch design (5) we first bend it into a one branch design, but with an extra long bit of wire on one side of the y-shape (4).
i-cord the length of the twig upright and the short side of the y-shape as for the one branch twig. Slip them onto the wire frame.
Cast on 4 stitches and i-cord a short length only. Slip this piece onto the long branch and slide right to the base. It is only now that we bend the wire frame into its final position (5), trapping the short length of i-cord in place.
Cast on 3 or 4 stitches and i-cord covers for the remaining pieces of uncovered wire.
Sew all joins together and loose any remaining loose ends.
Advanced Twig:
The world of twig is now open to you. The more branches you want the longer the piece of wire you will need. Plan carefully so you always have a way to slip the i-cord into position.
Notes:
Needle/Yarn Size
As with most ODDknit patterns the yarn and needle sizes in the "you will need" section are just a guide. Feel free to improvise with whatever needles and yarn you have lying around - that's half the fun!
<<< See more Trees and Leaves
© 2013 All desgins and images are copyright of ODDknit. If you enjoy the content of this website, please consider buying me a coffee at the link below.